
Connect Cereba.ai to LiveChat on GoHighLevel
Learn how to connect Cereba.ai to your GoHighLevel Live Chat so that you can engage website visitors, qualify them, and schedule an appointment right to your GHL calendar.
Incorporating Cereba AI for live chat on GoHighLevel allows you to automate customer interactions seamlessly. This guide will walk you through the setup process to integrate Cereba AI with your GoHighLevel workflows, enabling automated AI-driven conversations specifically for live chat.
Before Getting Started
- Ensure you've added the Cereba Custom Fields within the Cereba App.
How Cereba Enhances Your HighLevel Workflows
Cereba’s integration with GoHighLevel allows you to connect existing workflows to automate live chat responses, booking appointments, and more.
You’ll create three essential workflows:
- Process Message - Continues the conversation and processes additional live chat messages.
- Send Message - Sends live chat messages through GoHighLevel.
Depending on whether you are using Cereba for Live Chat exclusively or if you are combining it with another platform like SMS, the instructions will be a little different. We cover both below.
Option 1: Setting Up Cereba for Live Chat Exclusively (No Other Channels)
Workflow 1: Processing Messages with Cereba AI
This workflow captures messages sent in a live chat and forwards them to Cereba for processing.
Step 1: Create a New Workflow
- Go to "Workflows" in GoHighLevel and select "Create Workflow."
- Name your workflow "Cereba AI - Process Message."
Step 2: Set the Workflow Trigger
- Under the "Builder" tab, add a new trigger.
- Choose "Customer Replied" from the "Workflow Trigger" dropdown.
- Set FILTERS to:some text
- "Reply Channel" - Select "Live Chat."
- “Cereba Campaign” - Specify the Cereba campaign name Live Chat
Step 3: Add 'Send to Cereba' Webhook Action
- Add a Webhook action.
- ACTION NAME: Send to Cereba.ai
- Webhook Method: POST
- URL: https://api.cereba.ai/message/new
- Click “Save Action”
Workflow 2: Sending the Cereba AI Response
This workflow manages the response from Cereba, sending it back to the customer via live chat.
Step 1: Create a New Workflow
- Name it "Cereba AI - Send Message."
Step 2: Set the Trigger
- Choose "Contact Changed" from the "Workflow Trigger" dropdown.
- FILTERS: "Cereba Response" "Has Changed".

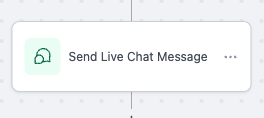
Step 3: Add 'Send Live Chat Message' Action
- Add the “Send Live Chat Message” action, using the "Cereba Response" custom field for the message content.
Option 2: Setting Up Cereba for Live Chat Along with Another Channel Like SMS
This setup is ideal for businesses that want to manage live chat alongside other communication channels such as SMS within GoHighLevel, using Cereba AI to automate responses across multiple platforms. Here's how to configure it:

Workflow 1: Processing Messages with Cereba AI
This workflow captures messages from both live chat and SMS, routing them to Cereba for processing. It uses conditional logic to handle the different channels.
Step 1: Create a New Workflow
- Navigate to "Workflows" in GoHighLevel and select "Create Workflow."
- Name your workflow "Cereba AI - Process Message."
Step 2: Set the Workflow Trigger
- Under the "Builder" tab, add two new triggers:some text
- Trigger 1: Customer Replied - SMS
- Trigger 1: Customer Replied - SMS

- Trigger 2: Customer Replied - Live Chat
- Trigger 2: Customer Replied - Live Chat

- Set FILTERS for each to match the corresponding reply channel.
Step 3: Add Conditional Logic
- Add an "If/Condition" step to create two branches in the workflow:some text
- Branch 1: If Workflow Trigger is Live Chat.
- Branch 2: If Workflow Trigger is SMS.

Step 4: Update Contact Fields for Live Chat
- In the Live Chat branch, add an action to update contact fields.some text
- Set "Cereba Campaign" to "Live Chat."
- Set "Cereba Campaign" to "Live Chat."

Step 5: Send to Cereba Webhook
- For both branches, add the Webhook action.
- Set the Webhook Method to POST and URL to https://api.cereba.ai/message/new

Workflow 2: Sending the Cereba AI Response
This workflow manages responses from Cereba, sending them back to the customer through the appropriate channel.

Step 1: Create a New Workflow
- Name it "Cereba AI - Send Message."
Step 2: Set the Trigger
- Choose "Contact Changed" from the "Workflow Trigger" dropdown.
- FILTERS: "Cereba Response" "Has Changed".

Step 3: Add Conditional Logic for Response Delivery
- Add an "If/Condition" step to check the "Cereba Campaign."some text
- If Campaign is Live Chat: Use the "Send Live Chat Message" action.
- Otherwise: Use the "Send SMS" action.
- Ensure the "Cereba Response" custom field is included in the message content for both actions

Testing and Troubleshooting
After setting up the workflows:
- Ensure you have a test contact with the correct Cereba Campaign for your SMS channel when testing that
- Test them by initiating conversations via live chat and SMS
- Check if the responses are correctly routed and formatted based on the channel used.
- Ensure "Cereba Disabled" is not checked.
- Verify that the contact is not marked DND.
- Check audit logs to see the workflow progression.
- Confirm webhook and message settings are correct.
Conclusion
With Cereba set up for live chat on GoHighLevel, you can automate sophisticated interactions without extensive coding or AI expertise. This integration not only enhances customer engagement but also streamlines your communication workflows, allowing you to focus more on strategic business activities.